![]()
Graphite drawing tools you need - Artist's Essentials
10 Best Drawing tools for realistic drawings - Artist’s Secret Essentials
After 15+ years of drawing portrait commissions of people, pets, architecture, and botanicals, I have found these tools indispensable for making my drawings always look breathtaking. I have used a variety of drawing tools on over 100 drawings I have made throughout my career. So I have made this list after much experimenting and finding out what tools were most reliable and would not do much damage to the paper. This list may be used by beginner artists and experienced artists’ especially those working on large volumes of commissioned drawings who are trying to level up on their drawing speed, technique, and process.
1. Graphite powder or charcoal powder

This is the most important tool as it can cover large areas. Creating backgrounds, textures, and midtones is much easier with powdered graphite/charcoal/conte instead of using stumps and speed up your initial art stages. For fully blackened backgrounds, you can use water-soluble graphite or charcoal powder, these are very easily available in your local art stores and online. For a slightly gray background, you can just use the powder dry. Another plus of using powder is it does not damage your paper media when trying to figure out the highlights. When used dry, it’s really easy to erase highlights and darken the shadows. If you find that the dry powder available in the market is not dark enough, you can opt to buy a higher grade stick like 14B graphite and make your own powder using a sanding screen (available at any hardware stores).
Some more info on Graphite and Charcoal
- Graphite and charcoal mediums are available in a range of grades based on compression and softness. Lighter grade graphite ranges from HB to 5B and darker grades start from 6B and up.
- Graphite is available in pencils, sticks, and water soluble powder; regular graphite leaves gloss on paper, pitt graphite is matte, does not leave a gloss.
- Charcoal sticks are graded based on level of compression: soft, medium, and hard. Charcoal does not leave gloss on paper but requires more effort in blending.
- Graphite sticks or charcoal sticks may be used directly on paper (for dark tones) or with a blending stump. Graphite is generally cooler in tone while charcoal is warmer in tone.
2. Cotton swabs and q-tips

Cotton swabs are of utmost importance when it comes to shading large areas softly without leaving texture. For large areas like shading an ocean, sky, portrait backings, etc., cotton swabs are one of the best tools so easily available to use. You can also use a makeup sponge or a blush applicator cushion (make sure they are smooth and clean or otherwise will leave stains that don't come off).
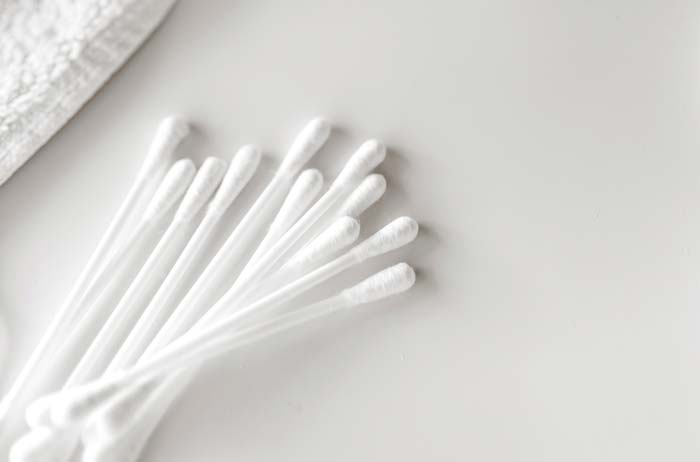
Cotton swabs and q-tips are my favorites for quickly shading skin and cloth. I use these two tools mostly with graphite powder since it's much finer. Charcoal is quite coarse and tends to leave a somewhat striped texture.
3. Clay embossing tools

Clay tools are extremely useful when it comes to drawing small highlights. They come in very handy for embossing highlights in hair, skin texture, metals, etc; and they make your drawing process much faster and in my experience, make drawings less complex. When I first discovered them, I was concerned if they’d make the highlights too harsh but once I really studied how to work with them, they reduced my work tremendously. Basically, I emboss the highlight areas that I do not want my pencil or powder touching and then when I go to draw over them, the highlight will stay clear for the most part and I don’t need to redo them later on.
4. Kneaded eraser

Kneaded erasers (or kneadable erasers) are moldable clay like erasers that can be shaped in the way the artists need to make highlights. Kneaded erasers give a lot of flexibility when bringing out different gray tones and highlights in your art. They work exceptionally well with graphite and charcoal powder. You can start by using a cotton swab for smooth midtones and shadows; and then use your clay eraser to bring out highlights. And the best part - they last a really long time. If your eraser has accumulated a lot of graphite on the outer surface, just massage it a bit and it’s ready to use again. I have had each one last around 2 to 3 years. If its starting to leave stains on paper even after massaging, it's time to get a new one.
5. Graphite pencils HB to 14B or light gray to black charcoal pencils
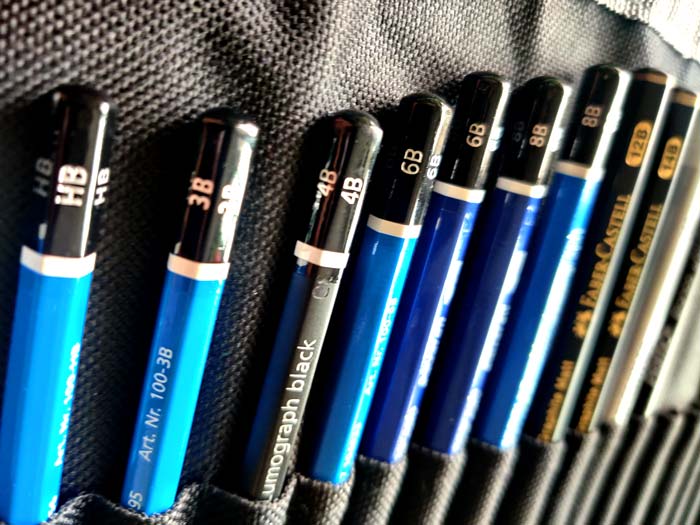
Do not underestimate the range of shades graphite and charcoal pencils can offer. Using the range of shades when suitable will prove to be a great time saver. In some cases, it is better to use a lighter pencil grade than to erase and lighten tones. So take advantage of all that’s available to you.
6. Blending stumps

Blending stumps are another useful tool for blending your super small areas when you do not want pencil lines to show. Areas that q-tips cannot blend can be easily covered by blenders. They work well with pencils (not pencil colors), graphite/charcoal sticks, and powders. However, when shading large areas, they tend to leave stroke lines. If pressed too hard while blending, these strokes can be hard to smooth out. I mostly use them to soften hair and to add small textures in my drawings; sometimes to blur backgrounds with details.
7. Graphite sticks or charcoal sticks

I have touched on these briefly before but graphite and charcoal sticks have versatile uses. They may be used directly or be used with a blending stump or they may be made into a powder. Graphite sticks or charcoal sticks may be used directly on paper (for dark tones) or with a blending stump. There are some differences between the two mediums though. Graphite is generally cooler in tone while charcoal is warmer in tone. In my experience, drawings look better when I match the tone of the paper to the medium but if you like the look, you can use it the way you want.
8. White charcoal or graphite
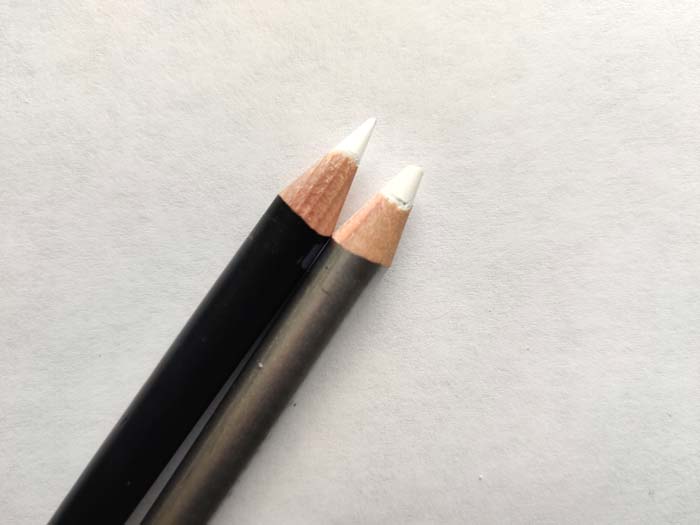
White charcoal or graphite or conte is another great tool for highlights. I only use these when any of the above highlight methods won't work or I made an error and can't fix it. This is my damage control tool - if I missed a highlight area, I use white charcoal pencil to add that back in. On a super thick layer of graphite/charcoal, this would fail to work.
9. Workable fixatif

If you haven’t already been using a workable fixatif, you are missing out! I’ve noticed most artists use a fixatif but if you don't, you most definitely should start to use a workable fixatif because it’s remarkable at keeping your drawings fresh when you’re working on a time-consuming artwork or maybe working on multiple pieces. With fixatif, you can come back to your art the next day and easily work further on the drawing while it retains its darker and lighter values intact and you do not have to redo some areas again. I myself discovered this a bit later but once I started using it, I haven’t looked back since. It keeps drawings fresh, and reduces extra work.
10. Graphite paper - 260 to 300 gsm weight
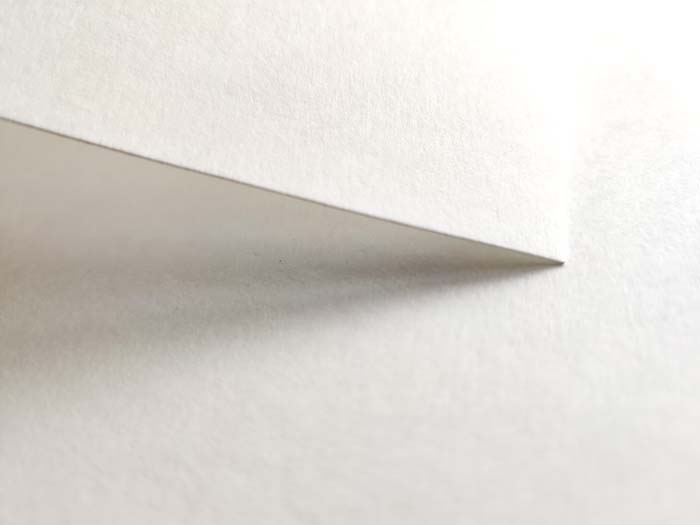
The paper media matters; especially the texture and weight of the paper when it comes to drawing detailed works whether commissioned or your other creations. There are commercial papers available at art stores but anything that is between 30 to 80lb paper weight is not the best for detailed drawings as they would not be able to handle water-soluble mediums or solvent or embossing or even much use of eraser. So I recommend using paper weights at least above 80lbs. For texture, this may depend on your style. I tend to use softer texture on paper to give me more control over strokes and smoother shading. You may use bristol or mixed media paper if you like texture; and if you don't, use low texture graphite specific papers or watercolor hot press paper (quite smooth but expensive). Thicker paper is also reliable while packaging and shipping works.
These are all the main tools that artists use on a daily basis for graphite drawing and commissions. In my experience, these tools have proven to be very reliable. I hope the above article is useful.