How to Improve Drawing - Realistic Drawing Tips
Drawing Tips For Beginners: Human Figures
Below are four foundational steps to prepare you for drawing human figures.
1. Pencil Pressure: Foundational Step For Easy Corrections
Pencil drawing is the foundation of visual art and deserves more time and practice than almost any other medium. A common mistake when starting out with graphite is pressing the pencil too hard against the paper. This leaves deep indents, making those initial lines extremely difficult to erase or blend out when you begin shading.
ALWAYS draw lightly to start. Once you master pencil pressure, building a basic structure to work from becomes much easier.

2. Gesture Lines and Armatures
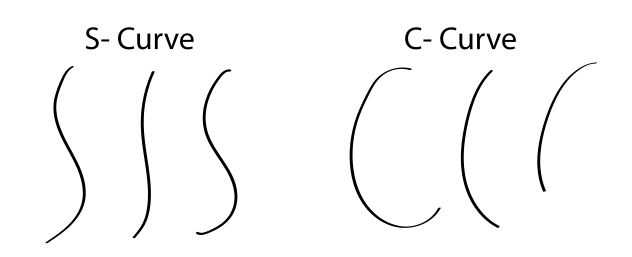
Gesture lines convey movement and action in human figures. Kept as simple as possible, they capture the overall posture of the subject. Gestures are typically built using three line types: S-curves, C-curves, and straight lines.
Once you understand gesture lines, you can use armature drawings to build a stronger grasp of anatomy. An armature acts as a simplified skeleton built over your gesture lines. You can practice drawing armatures using artist mannequins, which are readily available at most art stores.
(Note: When drawing non-human objects, these foundational guide strokes are often referred to as lines of symmetry.)

3. Using relative proportions for Accuracy
Relative proportion is a technique artists use to map out an armature accurately, especially when working from a reference image.
To practice this:
-
Start with Gesture Lines: Draw a few minimal lines to capture the main movement of your subject.
-
Establish the Head: Place a simple sphere or oval to mark the full head.
-
Measure Relative Distances: Without using a ruler, use your pencil at arm's length to gauge relative distances and angles—for example, measuring from the top of the head to the left elbow or hand.
-
Block in Limbs: Use simple cylindrical shapes for the arms and legs, and ovals for the hands and feet.
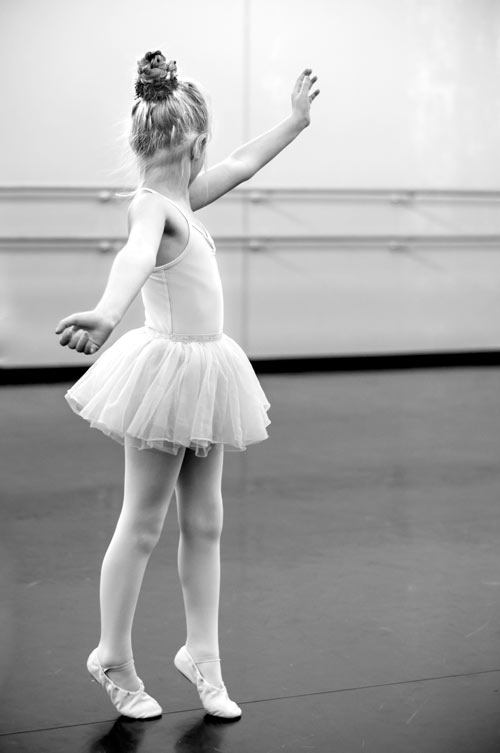
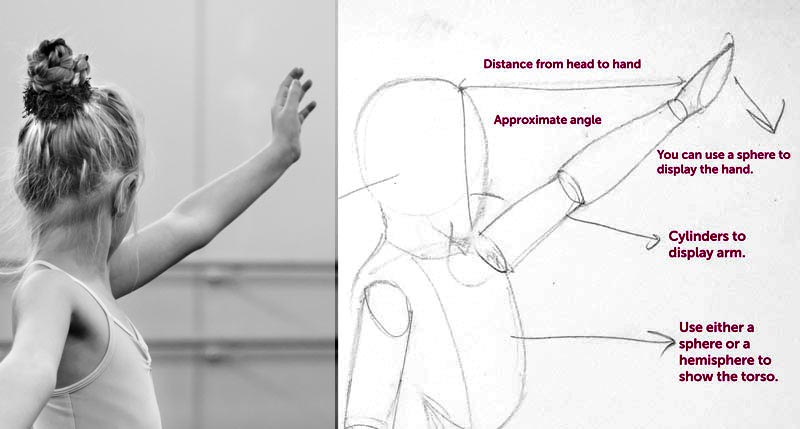
Using this process to turn a subject into simplified 3D shapes is called Mannequinization. You do not need to render every joint in detail; the goal is simply to break down complex posture and movement into manageable forms.
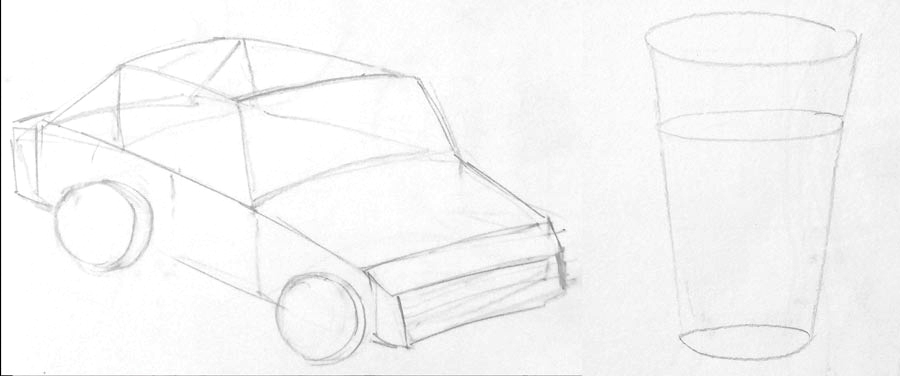
A Note on Simplification: Breaking subject matter down into simple 2D shapes before extruding them into basic 3D solids (spheres, cubes, cones, and cylinders) works for any complex object—from a simple glass to an automobile. Once these basic shapes are in place, adding details and realistic contours becomes significantly easier.

4. Adding volume, depth, and details:
With the subject's overall posture laid out, you can begin adding muscle volume and contour details to build form:
-
Maintain Controlled Pressure: Keep early construction strokes light, darkening lines only where necessary.
-
Use Confident Strokes: Draft lines that follow the natural flow of the muscles. Varying your line thickness can also help exaggerate muscle curves and create visual depth.
-
Finish with Value: Once your structure and contours are set, proceed to rendering your highlights, midtones, and shadows.
Bonus Tip: Try to visualize everything you draw in three dimensions. Even something as thin as a single sheet of paper has depth, no matter how small the measurement.